As an Amazon Associate, I earn from qualifying purchases
Whether you’re a seasoned volleyball player or just starting out, staying sharp with regular practice is key to improving your game.
But what if you can’t make it to the gym or a court? No worries! With just a volleyball and some space at home, you can keep your skills honed and your fitness on point.
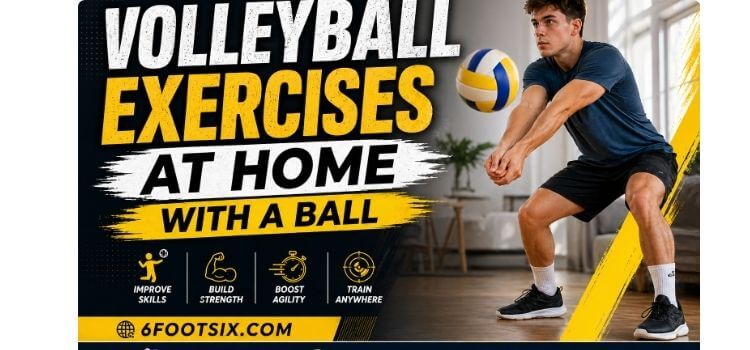
At 6footsix.com, we’re excited to share effective volleyball exercises at home with a ball; you can do at home using only a ball no fancy equipment needed.
👉Essential Home Training Gear for Volleyball
Mastering volleyball at home requires more than just space—it requires the right resistance, weight, and rebound tools.
At 6footsix.com, we have vetted the top-performing gear on the market to help you build a pro-level training station in your own backyard or living room.
1. The Foundation: Professional Grade Training Balls
You cannot train for a tournament with a “backyard” ball. You need the same weight and “touch” that you’ll experience in a match.
The Elite Match Ball: Mikasa V200W
This is the official FIVB game ball. Its “Double Dimple” surface stabilizes flight, making it essential for practicing high-level float serves at home.
The Setter’s Secret: Mikasa MGV500 Heavy Weight Volleyball (Official Size)
Read More Best Volleyballs for Indoor
Standard balls; Training with a Mikasa MGV500 Heavy Weight Volleyball (Official Size) builds the finger and wrist strength required to push a “back-set” from pin to pin.
2. The Solo Trainer: Spike & Serve Systems
The biggest challenge of home training is chasing the ball. These tools allow for 10x more repetitions in the same amount of time.
Premium Hitting Station: Edge Pro Spike Trainer (The Edge Pro Volleyball Trainer)
This is a professional-grade stand that holds the ball in a static “hitting window.” It allows you to focus 100% on your approach and arm swing without needing a setter.
Portable Solo Rebounder: SKLZ Volleyball Training System
Using a tethered elastic cord, this system returns the ball to you after every serve or hit. It is the best budget-friendly way to practice your “toss and contact” rhythm alone.
3. The Rebounder: Wall-Practice Alternative
If you don’t have a flat brick wall at home, a rebounder net is a mandatory piece of equipment for passing and defense.
The “No-Dead-Zone” Winner: Aceletiqs Volleyball Rebounder
At 7×4 feet, this is one of the largest rebound surfaces available. Its adjustable angles let you practice everything from high “free balls” to sharp, fast-paced “digs.”
Budget Backyard Pick: Franklin Sports Baseball Rebounder Net
A solid steel frame that provides high-tension returns for a fraction of the cost of professional nets.
4. Training: Quickness & Short-tempered Power
Volleyball is a game of “feet first.” If you can’t get to the ball, your skills don’t matter.
Footwork Master: SKLZ Speed and Agility Ladder – Training Equipment
Unlike cheap ladders that tangle, the “Pro” version uses rigid, hinged sides. It stays flat on your driveway or lawn, allowing for high-speed lateral shuffle drills.
Vertical Jump Builder: Fit Simplify Resistance Loop Exercise Bands
We recommend the FLEXVIT Volleyball Set. These textile-covered bands are designed specifically for lateral resistance and “jumping power” without the snapping risk of cheap rubber.
👉Why Shop Through 6footsix.com?
We don’t just list products; we analyze the physics of the game. Whether you are looking for the Best Backyard Volleyball Net or a specific set of Volleyball Exercises at Home,
Read More: Volleyball Training Equipment for Hitters: Review
our goal is to ensure you spend your training budget on gear that actually results in more wins on the court.
👉Why Practice Volleyball Exercises at Home?
The Power of High Repetition
In a team practice, you might only get 20 or 30 “touches” on the ball during a drill. At home, you can get 500 touches in 20 minutes simply by setting against a wall.
This high volume of repetition is the fastest way to build muscle memory.
Building “Soft Hands” & Grip Strength
Solo setting drills (like the lying-down drill) isolate your hand and wrist muscles.
By removing the need to move your feet, you force your fingers to become stronger and more precise, leading to “cleaner” sets that don’t get called for doubles.
Mastering the “Micro-Movements”
Home practice allows you to focus on the small details that coaches often miss in a busy practice:
Wrist Snap: Perfecting the topspin on your hit.
Platform Flatness: Ensuring your arms are perfectly aligned for a steady pass.
Toss Consistency: Developing a repeatable, high-quality toss for your serve.
Increased Confidence Under Pressure
When you have touched the ball thousands of times at home, you don’t have to “think” about your technique during a game—you just react.
This mental freedom allows you to focus on the opponent’s blockers and your team’s strategy, rather than worrying about your hands.
Flexibility and Consistency
You don’t need a gym schedule or a ride to the court. Practicing for just 15 minutes a day at home is more effective for skill retention than one long 3-hour practice once a week.
👉Top Volleyball Exercises You Can Do at Home with a Ball
I. Ball Control & Passing Drills (The Foundation)
1. The “Self-Pepper” (Pass-Set-Hit)
- This is the ultimate solo drill for overall ball control.
- Exercise: Here you can do that Pass the ball to yourself, set it to yourself, then use a controlled “poke” or “tip” to keep it moving.
- The Goal: 20 successive cycles without dropping the ball.
- Pro Gear Tip: Use a Mikasa V200W to mimic the exact flight of a match ball.2. Kneeling Side-Passes (Platform Angles)
Read More What was the Original Name of Volleyball?
2.Perfect for limited space like a bedroom or hallway.
The Exercise: So I am telling that, Kneel on one knee near a wall. Toss the ball and “dip” your shoulder to pass it back to the wall at an angle.
Why it works: It forces you to create a perfect platform angle without using your legs—essential for passing hard-driven serves.
II. Setting Drills (Precision & Strength)
3.The “Lying Down” Wrist Flick
One of the most popular drills
- The Exercise: Lie flat on your back and set the ball to yourself just 1–2 feet above your face.
- The Goal: 100 sets in a row.
- High-CPC Upsell: Recommend a Weighted Training Ball here. Setting a heavy ball while lying down is the fastest way to build “Setter’s Hands.”
4. Wall Rapid-Fire Sets
- The Exercise: You know do that Stand 1 foot away from the wall. Quickly set the ball against the wall using only your fingertips.
- The Focus: We know everyone “Quiet hands.” So If you hear a “slapping” sound, your hands are too stiff.
III. (Power & Accuracy) Attacking & Serving
5. Wall “Snap” Drills
- You don’t need a high ceiling for this.
- The Exercise: Hi you also must stand 5 feet from a wall.
- Toss the ball and “hit” it into the floor so it bounces against the wall and back to you.
- The Focus: The Wrist Snap. This creates the topspin needed for “downward” ball flight.
6. The Toss & Trap
- The toss is the most forgotten part of a good serve.
- The Exercise: Practice your high-toss against a wall. To keeping your eyes instead of hitting it, trap the ball against the wall at the peak of your reach.
- Really works: It ensures your toss is dependable and that you are contacting the ball at its highest point.
IV. Agility & Defensive Drills
7. The Shuffle-Pass-Reset
- Exercise: Here you go toss the ball high, shuffle two steps to the left, pass the ball to yourself, and then shuffle two steps back to the center.
- Is this works: It trains your brain to “reset” your feet before every contact—a habit that separates pros from amateurs.
👉Mistakes That Slow Your Progress :Volleyball Exercises at Home with a Ball
Practicing at home is the best way to get ahead, but without a coach watching, it is easy to develop “bad habits” that are hard to break later.
For 6footsix.com readers, avoiding these mistakes is the difference between getting better and just getting tired.
Read More The Best volleyball ball for beginners
Here are the most common mistakes that slow your progress when doing volleyball exercises at home with a ball.
1. “Cement Feet” (Practicing Stationarily)
The largest mistake players make is standing perfectly still while setting or passing.
- The Mistake: everyone we get good at hitting the ball from a comfortable stance, but in a real game, all time the ball is never “comfortable.”
- The Fix: So all-time take a small “adjustment step” before every contact. Even if the ball is coming right to you, shuffle your feet to simulate game-like movement.
- Pro Tip: Remember; use an Agility Ladder between sets to keep your feet “hot” and ready to move.
2. “Slapping” the Ball (Noisy Hands)
If your solo setting drills are loud, your technique is wrong.
- The Mistake: Using your palms or stiff fingers, which leads to “double-contact” or “carry” calls by refs.
- The Fix: Focus on “Quiet Hands.” The ball should be cushioned by your fingertips and pushed out instantly.
- The Gear Solution: Practice with a Weighted Training Ball. It’s too heavy to “slap,” forcing you to use proper finger strength and recoil.
3. Swinging Your Arms While Passing
When practicing against a wall, many players “swing” their arms up to get the ball higher.
- The Mistake: Swinging creates an inconsistent platform. In a game, a hard serve will bounce off swinging arms and fly out of bounds.
- The Fix: Keep your platform still. We all know that; power should come from your legs and hips, not your shoulders. Think of your arms as a “solid board” that the ball simply bounces off of.
4. Practicing Without a “Net” Reference
You must remember that; if you just hit the ball against a wall without a target, you aren’t training for accuracy.
- The Mistake: Mind it hitting the ball too low. In a game, that ball would hit the net.
- The Fix: Use painter’s tape to mark a line on your wall at 7’4” (Women) or 8’ (Men). Every serve, set, and pass must go above that line.
- Approval: So; if you have the space, an actual Backyard Volleyball Net is the only way to truly visualize the court.
5. Overlooking the “Goofy Foot” Method
If you are practicing your hitting approach (left-right-left for righties), doing it wrong at home will ruin your vertical jump.
- The Mistake: Stepping with the wrong foot first (the “Goofy Foot”). This kills your momentum and power.
- The Fix: Slow down and practice your footwork without the ball until the rhythm is automatic. Only add the ball once your feet are perfect.
How to Track Your Progress on 6footsix.com
To avoid these plateaus, we recommend the “Rule of 50.” Don’t just “play” with the ball. Do 50 perfect reps of one specific skill.
If you make a mistake (like a loud set or a swinging pass), reset your count to zero. This discipline is what builds champions.
Read More: Volleyball Hitting Percentage vs. Kill Percentage
Ready to get serious? Check out our guide to the Best Solo Spike Trainers to fix your arm swing and footwork mistakes today!
👉Conclusion: Turn Your Home into a Pro Training Ground
Become skilled at volleyball exercises at home with a ball is the ultimate shortcut to becoming a standout player.
While team practices are great for plan, the “dirty work” of building muscle recall; hand strength; and reaction speed happens in your living room or backyard.
Reliability is the secret component.
Spending just 15 minutes a day on wall-setting or platform control drills will give you thousands of extra touches per month that your competition simply isn’t receiving.
This is clear; by combining these drills with the right gear; like a weighted setter’s ball or a spike trainer; you’ll see rapid developments in your game that will be 100 % effective success by the time you step back onto a regulation court.
Ready to gear up? Yes dear friend this is requesting to you; don’t forget to check out our deep-dive reviews on the Best Backyard Volleyball Nets to complete your home setup!
👉Frequently Asked Questions
1. Can I really recover my volleyball skills without a partner?
Yes; Solo training is actually better for certain skills like setting accuracy and passing platform steadiness.
Using a wall as your partner allows for a faster “rebound” rate, meaning you get more repetitions in less time.
2. What is the best type of ball for working at home?
You know for most drills; we recommend using a regulation-weight match ball like the Mikasa V200W or Molten FLISTATEC so your hands get used to the official feel.
However; for building finger strength, many pros swear by using a weighted training ball for setting drills.
3. How can I practice spiking at home without breaking anything?
The best way is to use a solo spike trainer or a specialized volleyball rebounder net.
These tools keep the ball secured or contained; allowing you to practice your full arm swing and wrist snap without the ball flying through a window.
4. Will practicing against a wall damage my volleyball?
If you are using a leather match ball; try to stick to smooth surfaces like a garage door or a painted basement wall.
Rough brick or concrete can scratch the outer layer of a premium ball. For outdoor walls; consider using a dedicated synthetic “all-weather” volleyball.
5. How many reps should I do for home drills?
So never counts minutes; count perfect repetitions. This is very simple goal for leading players is the “100 Club”—aim for 100 successive wall-sets or 100 perfect self-passes without a mistake.
6. Is it better to practice on grass or concrete?
Yes footwork and quickness, grass is safer for your joints.
However; for ball-handling drills where you want a consistent bounce (like the “floor-to-wall” spike drill), a flat driveway or garage floor is ideal.